- 23 May, 2020
- read
- Majid Fatemian
Application monitoring systems are an inseparable part of software development, especially in distributed environments where applications like Hadoop and Apache Spark have become the defacto standard for processing large volumes of data efficiently.
If a system relies on third party services to get either of these, usually there is some amount of work involved to do the wiring and configuration to get them working together.
This article shows how to get the NewRelic’s Java agent up and running in Databricks pre-provisioned clusters or job clusters.
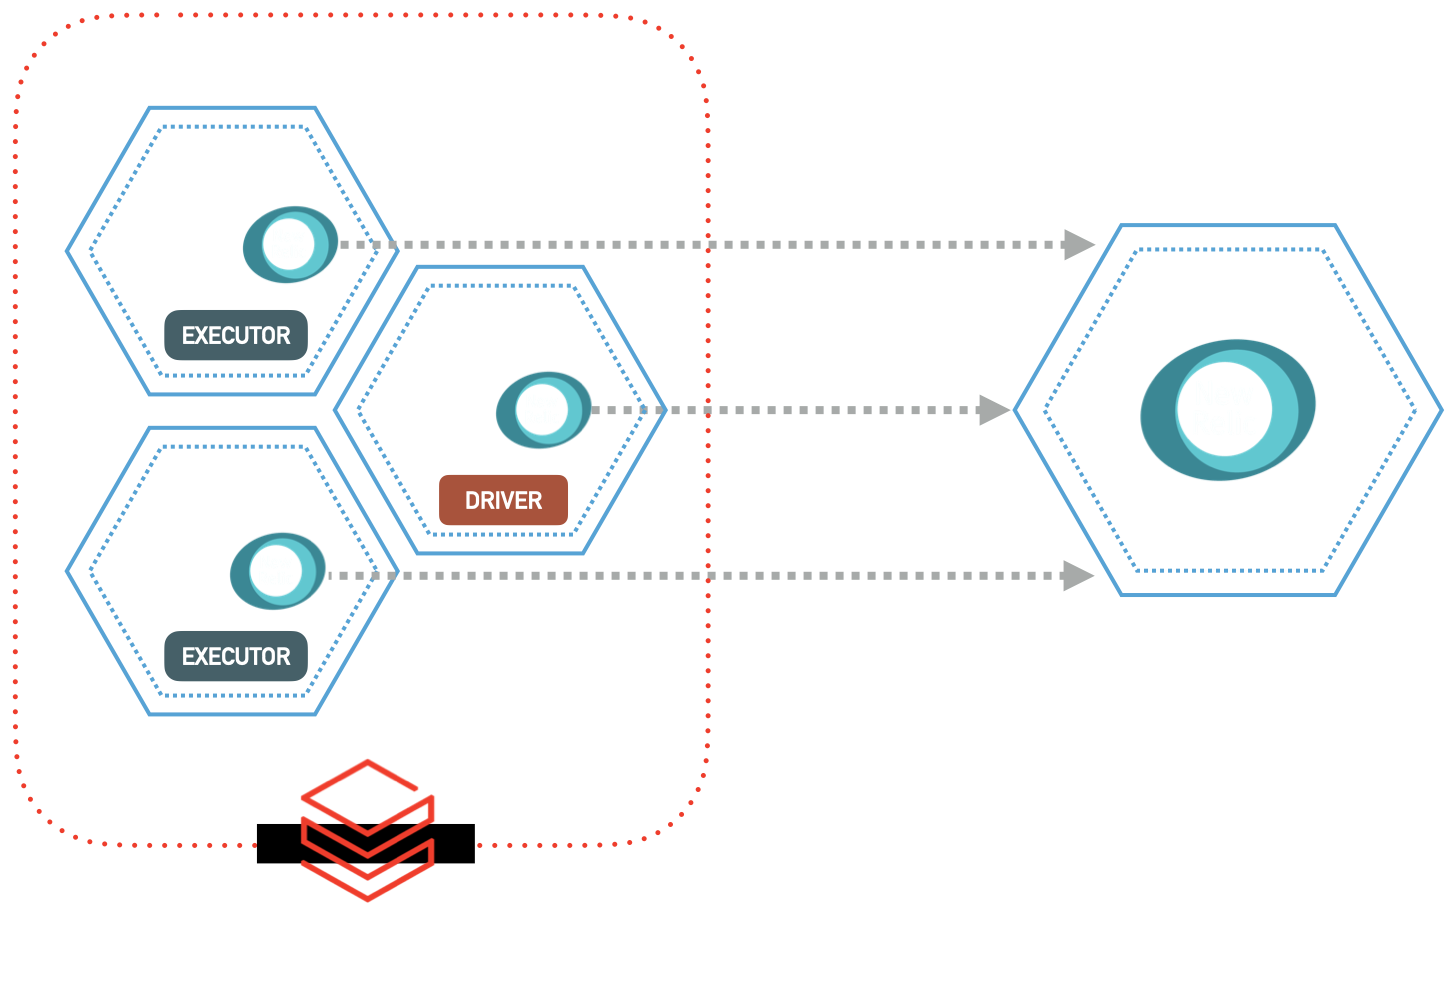
Agent on Driver & Executors
First step is to get the agent’s file downloaded or make it accessible on the servers. You need the NewRelic’s agent jar file and also the config file. The config file will be picked by the agent automatically.
We can manually upload these to a location in dbfs (Databrick’s File System) and be done with this, but if we have multiple clusters and you want slightly different configurations for each, you can do this through some init scripts.
Here is an example, which will create a newrelic subfolder inside the /tmp. Just keep in mind that the init script will be executed on the Driver as well as All Executors. So all of them will get an instance of the agent and the configuration, which is the result we are looking for.
For this example, we are just using the NewRelic’s default config template.
#!/bin/bash

#  Creating the tmp and logs folder for NewRelic agent
mkdir -p /tmp/newrelic/logs
mkdir -p /tmp/newrelic/tmp


curl  -o /tmp/newrelic/newrelic.jar https://download.newrelic.com/newrelic/java-agent/newrelic-agent/{{NEWRELIC_AGENT_VERSION}}/newrelic-agent-{{NEWRELIC_AGENT_VERSION}}.jar
curl  -o /tmp/newrelic/newrelic.yml https://download.newrelic.com/newrelic/java-agent/newrelic-agent/{{NEWRELIC_AGENT_VERSION}}/newrelic.yml

# Update the License Key as needed.
Here is also where we can inject the NewRelic’s License Key. Retrieve it from wherever it is securely stored and replace it in the config file. Or we can just inject it as an environment variable which NewRelic’s agent will automatically picks it up.
Databricks File system is accessible at “/dbfs” on servers immediately as they come online. If we need to point to a resource in dbfs during an init script, it’s preferred to use “/dbfs” to reference it rather than “dbfs://”. As it may have not been fully mounted while the init script is running.
Start Spark with the Agent
Next we need to tell the Driver and all Executors, to use a Java agent (NewRelic agent) along side the Apache Spark.
For this we need to pass that as an extra spark_conf under spark.driver.extraJavaOptions for the Driver and spark.executor.extraJavaOptions for the Executors.
But those configs are already set with some values by Databricks. To have our new values injected there, we basically need to find the existing ones, then append what we need on top of them, and pass the whole new setting to the cluster. Unfortunately there is no way to just append to the existing configs.
You can get the existing values from the cluster configuration page or using jobs / clusters APIs (job clusters also have a cluster assigned to them).
In your job or cluster configuration put those existing values in spark_conf section like below:
{
    "spark_version": "....",
    "spark_conf": {
        "spark.driver.extraJavaOptions": "...",
        "spark.executor.extraJavaOptions": "-Djava.io.tmpdir=/local/tmp -XX:ReservedCodeCacheSize=... -XX:+UseCodeCacheFlushing -Djava.security.properties=/databricks/spark/dbconf/java/extra.security"
    }
}
then all you need is to add javaagent and newrelic.tempdir to those, pointing to the values that you have in your init script or where they are located in dbfs. Our final config would look like this:
{
    "spark_version": "....",
    "spark_conf": {
        "spark.driver.extraJavaOptions": "-javaagent:/tmp/newrelic/newrelic.jar -Dnewrelic.tempdir=/tmp/newrelic/tmp",
        "spark.executor.extraJavaOptions": "{{PREV_VALUES}} -javaagent:/newrelic/newrelic.jar -Dnewrelic.tempdir=/newrelic/tmp"
    }
}
Now the cluster is completely setup with NewRelic’s agent. As long as it finds the right License key, it can start communicating with NewRelic’s servers.
Instrumenting the Code
The final part of this, is to actually start using the agent in our code that runs on Databricks cluster.
To add the dependencies, the pom.xml file would look something like below, similarly for the other package managers:
    <dependency>
        <groupId>com.newrelic.agent.java</groupId>
        <artifactId>newrelic-agent</artifactId>
        <version>{{NEWRELIC_AGENT_VERSION}}</version>
        <scope>provided</scope>
    </dependency>
    <dependency>
        <groupId>com.newrelic.agent.java</groupId>
        <artifactId>newrelic-api</artifactId>
        <version>{{NEWRELIC_AGENT_VERSION}}</version>
        <scope>compile</scope>
    </dependency>
NewRelic’s agent will start picking up info from code automatically. If we need to specify which exact method to trace as Transactions or add Custom Parameters to it, we can use it like this in Scala / Java:
import com.newrelic.api.agent.Trace
import com.newrelic.api.agent.NewRelic

// …

  // The @Trace annotation will create a new Transaction on NewRelic's side
  @Trace(dispatcher = true)

  def method_with_newrelic_tranx(): Unit = {
    // …
    NewRelic.addCustomParameter("param", "value")
    // …
  }

// …
Congrats! Now we are all set.
We have created and installed NewRelic’s agent, have told our cluster to use it as a Java agent before spinning up Apache Spark Driver and Executors, and finally we have instrumented it in our code and started sending data to NewRelic.
Happy monitoring!
If you have found this article interesting, you can Connect with me on Linkedin.